Sourdough Starter: A Beginner’s Simple & Efficient 4-Step Guide
Do you ever wonder how to make sourdough starter but are stuck on where to start? Do you want to bake golden, tangy loaves like the ones you see all over the internet and in books? If your answer is yes, I’ve got your back! This guide will take you through the basics of creating your homemade sourdough starter. Don’t worry about your skill level. You will be ditching yeast before you know it! Well, you must be a little patient because getting your starter going might take some time. But it is all worth it!
I started my sourdough starter journey in 2023 and will never return to commercial yeast! When I first started, I had no idea what I was getting myself into. Baker’s yeast was my go-to for all of my leavened goods. So, I started looking for all the information I could find about how to start my own starter.
My very first attempt at sourdough starter was a complete failure. I mixed the flour and water and followed every single step: the feeding ratio, the filtered water, fresh flour, and discarding half every time I fed it. And then, I waited. After a week or so, the mixture started producing an odor that wasn’t very pleasant (to say the least!). I decided to throw it away and start back over.
This second time, I followed the same process. The flour and filtered water mixture smelled slightly on day 3 or 4, but nothing like the first time. So, I kept going. After about two weeks, it started getting mold on the sides of the jar. Even though I didn’t see anything on the actual mixture, I didn’t want to risk it and threw it all out. On to my third attempt.
At this point I was about ready to give up and keep using yeast. All sources I read made it seem like it was super quick to have your own starter (7-14 days was the “norm” for a double rise). I made multiple jars with different flour-to-water ratios. I read somewhere that the best flour for sourdough starter is whole wheat. So, there I was with one of the jars with whole wheat flour and water. I started feeding each jar twice a day. And FINALLY, after a month, one of them worked! It wasn’t until I did my own thing and followed my instincts that I got it to work.
I am sharing my story with you because I don’t want you to be disappointed if your starter doesn’t work after a week, as most sources claim. It takes some time and patience, but it will stay for good once you have it going.
What is a Sourdough Starter?

Let’s start with the super basics of sourdough starter; what the heck is it?
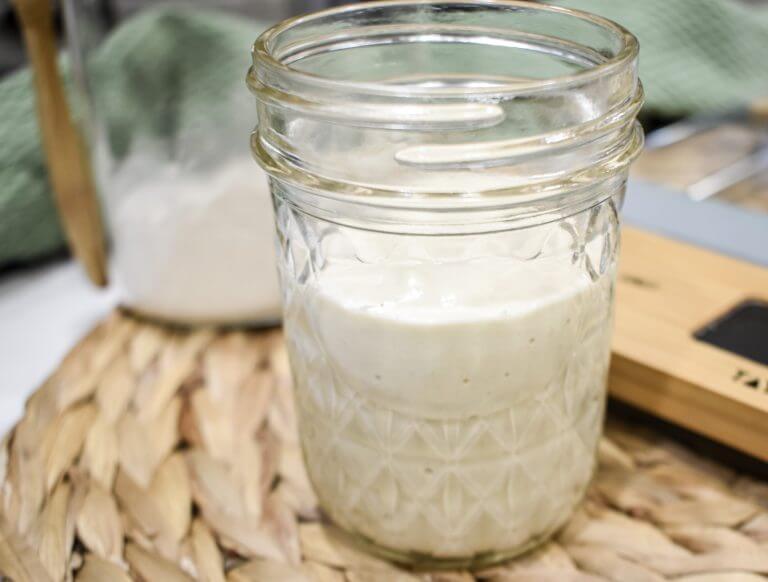
The boring definition: A sourdough starter is a fermented mixture of flour and water that serves as a natural leavening agent for baking sourdough bread and other sourdough-based goods. It’s essentially a live culture of wild yeast and beneficial bacteria that thrive in the mix, creating the gases necessary to make the dough rise. Unlike commercial yeast, a sourdough starter ferments the dough through a long, slow process, contributing to the bread’s distinct tangy flavor, improved texture, and nutritional benefits.
The starter is maintained by regularly “feeding” it with more flour and water, keeping the yeast and bacteria alive and active. This process can go on indefinitely, with some starters being passed down through generations.
The simple definition: A sourdough starter is a simple mix of flour and water that’s left to ferment. Over time, it captures wild yeast and good bacteria from the air. These tiny organisms eat the sugars in the flour, creating gas (bubbles) as a byproduct. This fermentation process is what makes the starter alive and active.
Fermentation Process
The fermentation process for a sourdough starter is a cool natural wonder where flour, water, and invisible microorganisms team up to create something awesome. Here’s how it breaks down:
Mixing Flour and Water: You start by mixing flour and water. This simple mix sets the stage for the magic to happen.
Catching Microorganisms: The mixture is then left exposed to the air. Wild yeast and good bacteria in the environment (and the flour itself) move in and make themselves home in your gooey mix. These are the key players in the fermentation.
Feasting Time: Once settled, these tiny creatures start feasting on the sugars found in the flour. Although flour doesn’t taste sweet, it is full of complex carbohydrates that these microorganisms break down into simple sugars they can eat.
Producing Gas and Acids: As the yeast and bacteria eat, they produce carbon dioxide gas and various acids. The carbon dioxide gas gets trapped in the sticky dough, which is what causes the starter (and later the bread dough) to rise and become airy. The acids, on the other hand, give the sourdough its distinctive tangy taste.
Repetition and Growth: By regularly “feeding” the starter more flour and water, you’re giving the yeast and bacteria more food to consume, which keeps them active. This process maintains the sourdough starter and helps it grow in volume and strength, getting it ready for baking.
This cycle of feeding and fermenting can go on indefinitely, with the starter becoming more powerful and flavorful over time. Each sourdough starter is unique, influenced by its specific mix of local yeast and bacteria, which is why sourdough bread from different places can taste quite different. It’s nature’s bakery at work in your kitchen!
Why Go Sourdough?
This is the one-million-dollar question! Why go through the trouble of making your own sourdough starter if you can just use commercial yeast? Sourdough starter for bread and other baked goods gives an amazing flavor profile that is non-existent when using commercial yeast. In addition to the flavor, sourdough is a better option for your health. Here’s why sourdough can be good for you:
Easier Digestion: Sourdough fermentation breaks down gluten, the protein found in wheat that can cause digestive issues for some people. This means that sourdough is often easier to digest than regular bread.
Improved Nutrient Absorption: The fermentation process also helps break down phytates, which are compounds that can inhibit the absorption of minerals like iron, zinc, and calcium in the body. This means you get more nutritional bang for your buck with sourdough.
Lower Glycemic Index (GI): Sourdough has a lower GI than many other bread types. This results in a slower increase in blood sugar levels, which can be especially helpful for managing diabetes and sustaining energy levels.
Natural Preservatives: The acids produced during sourdough fermentation act as natural preservatives, meaning sourdough bread tends to have a longer shelf life without the need for added chemicals.
Probiotics: While the baking process kills the live bacteria in the sourdough, the lactic acid bacteria present during fermentation can produce beneficial compounds and may contribute to a healthier gut microbiome.
Richer Flavor: Beyond health, the fermentation gives sourdough a unique tangy flavor and a chewy texture that many prefer over conventional bread’s blandness.
No Need for Additives: Sourdough bread requires only a few simple ingredients: flour, water, salt, and the starter. This simplicity contrasts many commercial breads, which are filled with additives and conditioners. Who wants to eat that?! Yuck!
Choosing sourdough is not just a matter of taste; it can contribute to better digestive health, more stable energy levels throughout the day, and an overall healthier diet. Not to mention that watching your starter come to life is pretty cool!
Fun Fact:
Before commercial yeast was available, all bread was made using sourdough!
I don’t know about you, but it makes me wonder why celiac disease wasn’t as common back then. Now 1 in 133 Americans are diagnosed with celiac. Just food for thought! 😉
Getting Started
Now, on to the fun part of this: how do you get your sourdough starter going?
What you’ll need:
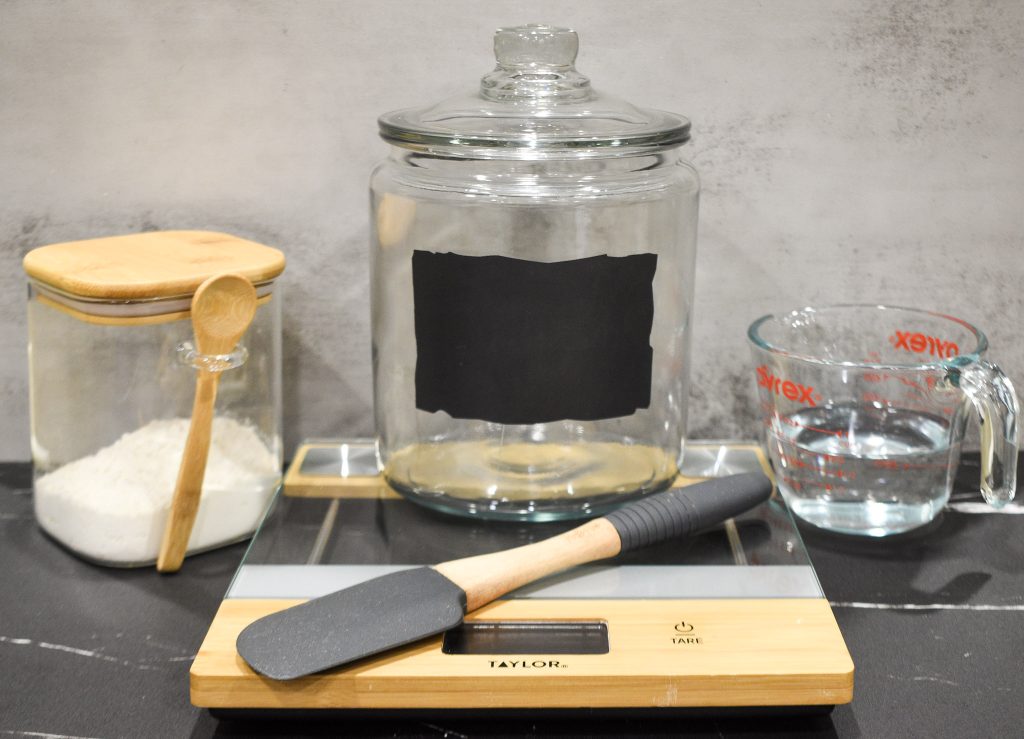
Flour:
I use organic all-purpose flour, but you can use other types of flour like whole wheat flour or rye flour. Some other sources recommend the latter because it’s rich in nutrients and microbes. However, all-purpose flour worked great for me.
Water:
Use lukewarm water to help kickstart the fermentation process. Ensure it’s filtered or dechlorinated, as chlorine can inhibit the growth of wild yeast and bacteria.
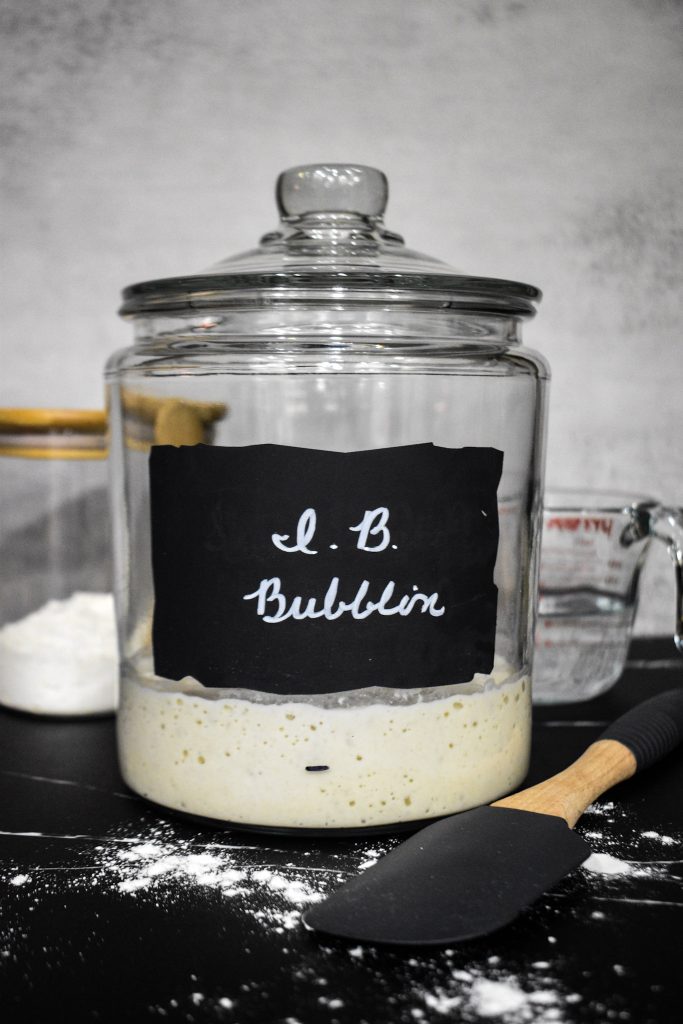
A Jar or Container:
Use a clean, medium-sized glass container. Make sure it’s not airtight – gases need to escape.
A Scale or Measuring Cups:
Precision helps, especially at the start. If you have a kitchen scale, that’s great. If not, measuring cups will do.
You can also buy a sourdough starter kit with most of these tools.
Instructions:
Day 1
Step 1
Mix: Combine 100 grams (about 3/4 cup) of flour with 100 grams (about 1/2 cup) of lukewarm water in your container. Stir vigorously with a spatula. You’re aiming for a thick but mixable consistency, somewhat like pancake batter. This vigorous mixing incorporates air and distributes the yeast and bacteria throughout the mixture.
Step 2
Cover: Cover the container with a cloth or a loose lid. This is to keep out dust and bugs while allowing air, which carries the wild yeast and bacteria, to circulate
Step 3
Rest: Leave your container at room temperature (68°F to 75°F is ideal) away from direct sunlight. This will give the wild yeast and bacteria time to wake up and start the fermentation.
Step 4
Observe: You might not see much change in the first 24 hours, and that’s perfectly normal. In some cases, you might notice a few small bubbles or a bit of rise, which are signs that the wild yeast is beginning to work.
What’s Happening?
On Day 1, you’re creating an environment where wild yeast and good bacteria can thrive. The flour provides food, and the water creates a hospitable environment for fermentation. Mixing these two sets the stage for these microorganisms to start producing the gases and acids that will eventually leaven your bread and give sourdough its distinctive taste.
Reminder:
Patience is key in the early days of creating a sourdough starter. It might take a few days before you see significant activity, so don’t be discouraged if your starter seems quiet at first. You’re on your way to creating a living, bubbling baker’s tool that can last a lifetime!
Days 2 – 7
From Day 2 onward, your sourdough starter might begin to show signs of life, and you’ll start the routine of feeding it to encourage growth and activity. Here’s what to expect and how to proceed:
Day 2:
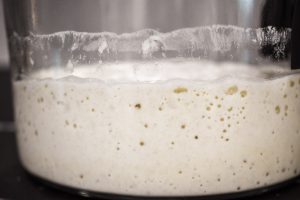
Observation: You might notice a few bubbles and possibly a slight increase in volume. This is a good sign—it means the wild yeast and bacteria are starting to ferment the flour. At this point, your starter might have a sweeter smell or still smell like fresh flour.
Feeding: Discard half of your starter (around 100 grams) to avoid ending up with too much starter. Then, add 100 grams (about 3/4 cup) of flour and 100 grams (about 1/2 cup) of lukewarm water to the remaining starter. Mix well, cover, and let it sit at room temperature.
Day 3:
Activity Increases: You’ll likely see more bubbles, and the starter may have a slight rise and fall after feeding. The smell may start to change, ranging from fruity to slightly sour.
Repeat Feeding: Continue the process of discarding half the starter and replenishing it with flour and water.
Day 4-7:
By now, you might see signs of activity: bubbles, a pleasant sour smell, and a rise in volume after feeding. If it is anything like mine, you might not see any signs or just a few bubbles at this point. The smell might still be sweet. You might also notice a nail polish-like smell or alcohol.
Feeding Routine: Keep feeding your starter daily, maintaining the same ratio. Some bakers switch to a 1:1:1 ratio (starter:flour:water) for ease of measurement.
Day 7 and Beyond
Continue the same feeding pattern and keep observing what your starter is doing. If you notice that the smell is more like nail polish or alcohol, try changing your feedings to twice daily (once in the morning and once before bed).
DO NOT GIVE UP! Keep feeding it and change ratios if needed. At one point, I had to change my ratios to 2:1:1 (starter:flour:water). There’s nothing wrong with experimenting with your starter to see what works best for your environment. Remember, I had 4 jars going on at the same time during my 3rd attempt.
Notes on Feeding:
– Flour Type: You can start introducing all-purpose flour if you began with whole grain or continue with whole grain if you prefer.
– Water: Always use lukewarm, dechlorinated water to encourage yeast activity.
– Temperature: Room temperature (68°F to 75°F) is ideal for cultivating a healthy starter.
Troubleshooting:
No Activity: If you see little to no activity by Day 4, try moving your starter to a slightly warmer spot, checking that your water is not too chlorinated, and ensuring your flour is fresh. I think one of my problems was the temperature being too cold in my kitchen. I started leaving it in the oven overnight with the light on to keep it warm and cozy.
Liquid on Surface: A layer of liquid might form on the top of your starter; this is called “hooch” and is a sign of hunger. Stir it back in or pour it off before feeding. This means you will need to start feeding more often to avoid starvation and bad bacteria from taking over.
Alcohol smell: You’re starving your little babies! Feed sourdough starter twice a day, about 12 hours apart.
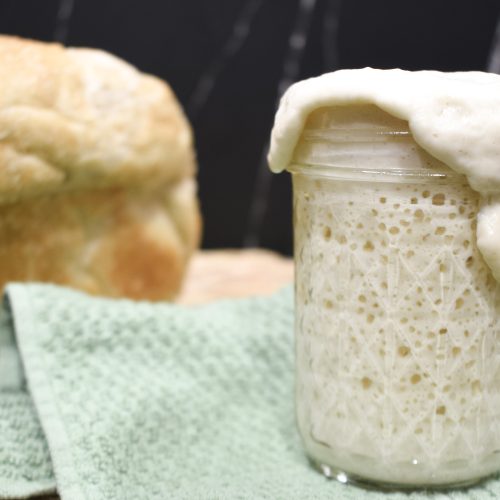
When is My Starter Ready?
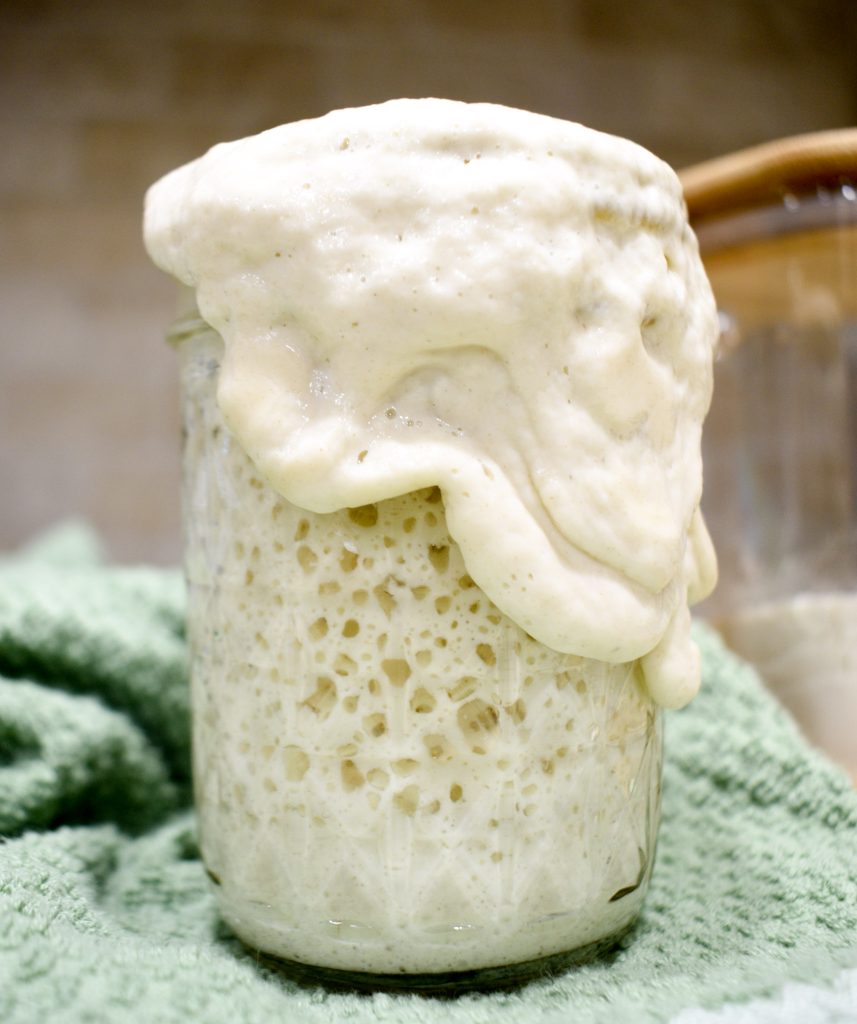
Your starter is ready for baking when it consistently rises and falls after feedings, usually doubling in volume within 4 to 8 hours. Many sources say typically around Day 7, but this can vary depending on conditions. The starter should have a pleasantly sour aroma and be full of bubbles.
Creating a strong sourdough starter is a rewarding process that requires observation, patience, and a bit of trial and error. Before you know it, you will have a lively culture of yeast and bacteria ready to leaven delicious sourdough bread and other baked goods. Remember, each starter is unique, and variations in temperature, flour, and water can all influence its development.
Sourdough Starters Smell
During the fermentation process of a sourdough starter, the smells it emits can change a lot, providing clues about its health and fermentation stage. These smells change as different bacteria and yeast populations rise and fall over time. Here is what to expect:
– Fresh Flour Smell: Initially, your starter will smell much like the flour it’s made with, maybe slightly sweeter due to the water addition.
– Grassy or Yeasty: As yeast begins to activate, you might detect a faintly grassy or yeasty smell. This is normal and indicates the start of fermentation.
– Sour or Tangy: The smell becomes more pronounced as the lactic acid and acetic acid bacteria start producing acids. This sour or tangy smell is a good sign and shows your starter is developing complexity.
– Fruity or Alcoholic: You might also notice fruity or alcoholic notes, especially if a layer of liquid (hooch) forms on top. This is due to fermentation byproducts like ethanol.
– Pleasantly Sour: A healthy, active starter will have a distinctly sour but pleasant smell, similar to yogurt. This aroma is a sign of a balanced environment of yeast and bacteria.
– Slightly Vinegary: If the smell leans towards vinegary, it means acetic acid is more prominent. While not necessarily bad, a very strong vinegar smell might indicate your starter is hungry and needs more frequent feedings.
– Cheesy or Unpleasant: An off-smelling starter, especially if it smells like cheese, spoiled milk, or is particularly putrid, could indicate unwanted bacteria. This is rare but might require starting over or more strict feeding to correct.
Paying attention to the smell of your sourdough starter is important for understanding its health and fermentation stage. Each stage has its own characteristic scent, which should be sour and yeasty but not unpleasant.
If the smell indicates something might be off (too sour, vinegary, or unpleasant), adjusting your feeding schedule, the flour-to-water ratio, or even the type of flour can help rebalance the starter’s microbial community.
Observing and becoming familiar with the changing smells of your sourdough starter is part of the fun and science of sourdough baking. It’s a sensory journey that can help you better understand and care for your starter, leading to delicious sourdough bread.
Storing Your Sourdough Starter
Storing your sourdough starter is the easy part. It all depends on how often you will be using it and the temperature of your kitchen. I use mine at least 3 times per week, so I leave it on the counter for the days I will be using it and feed it regularly (once a day on a cold day or twice if warm).
On the days I give it a break, I feed it once and then store it in a glass jar in the refrigerator. This slows down the growth rate of your active sourdough starter. That means that the bacteria consume less sugar.
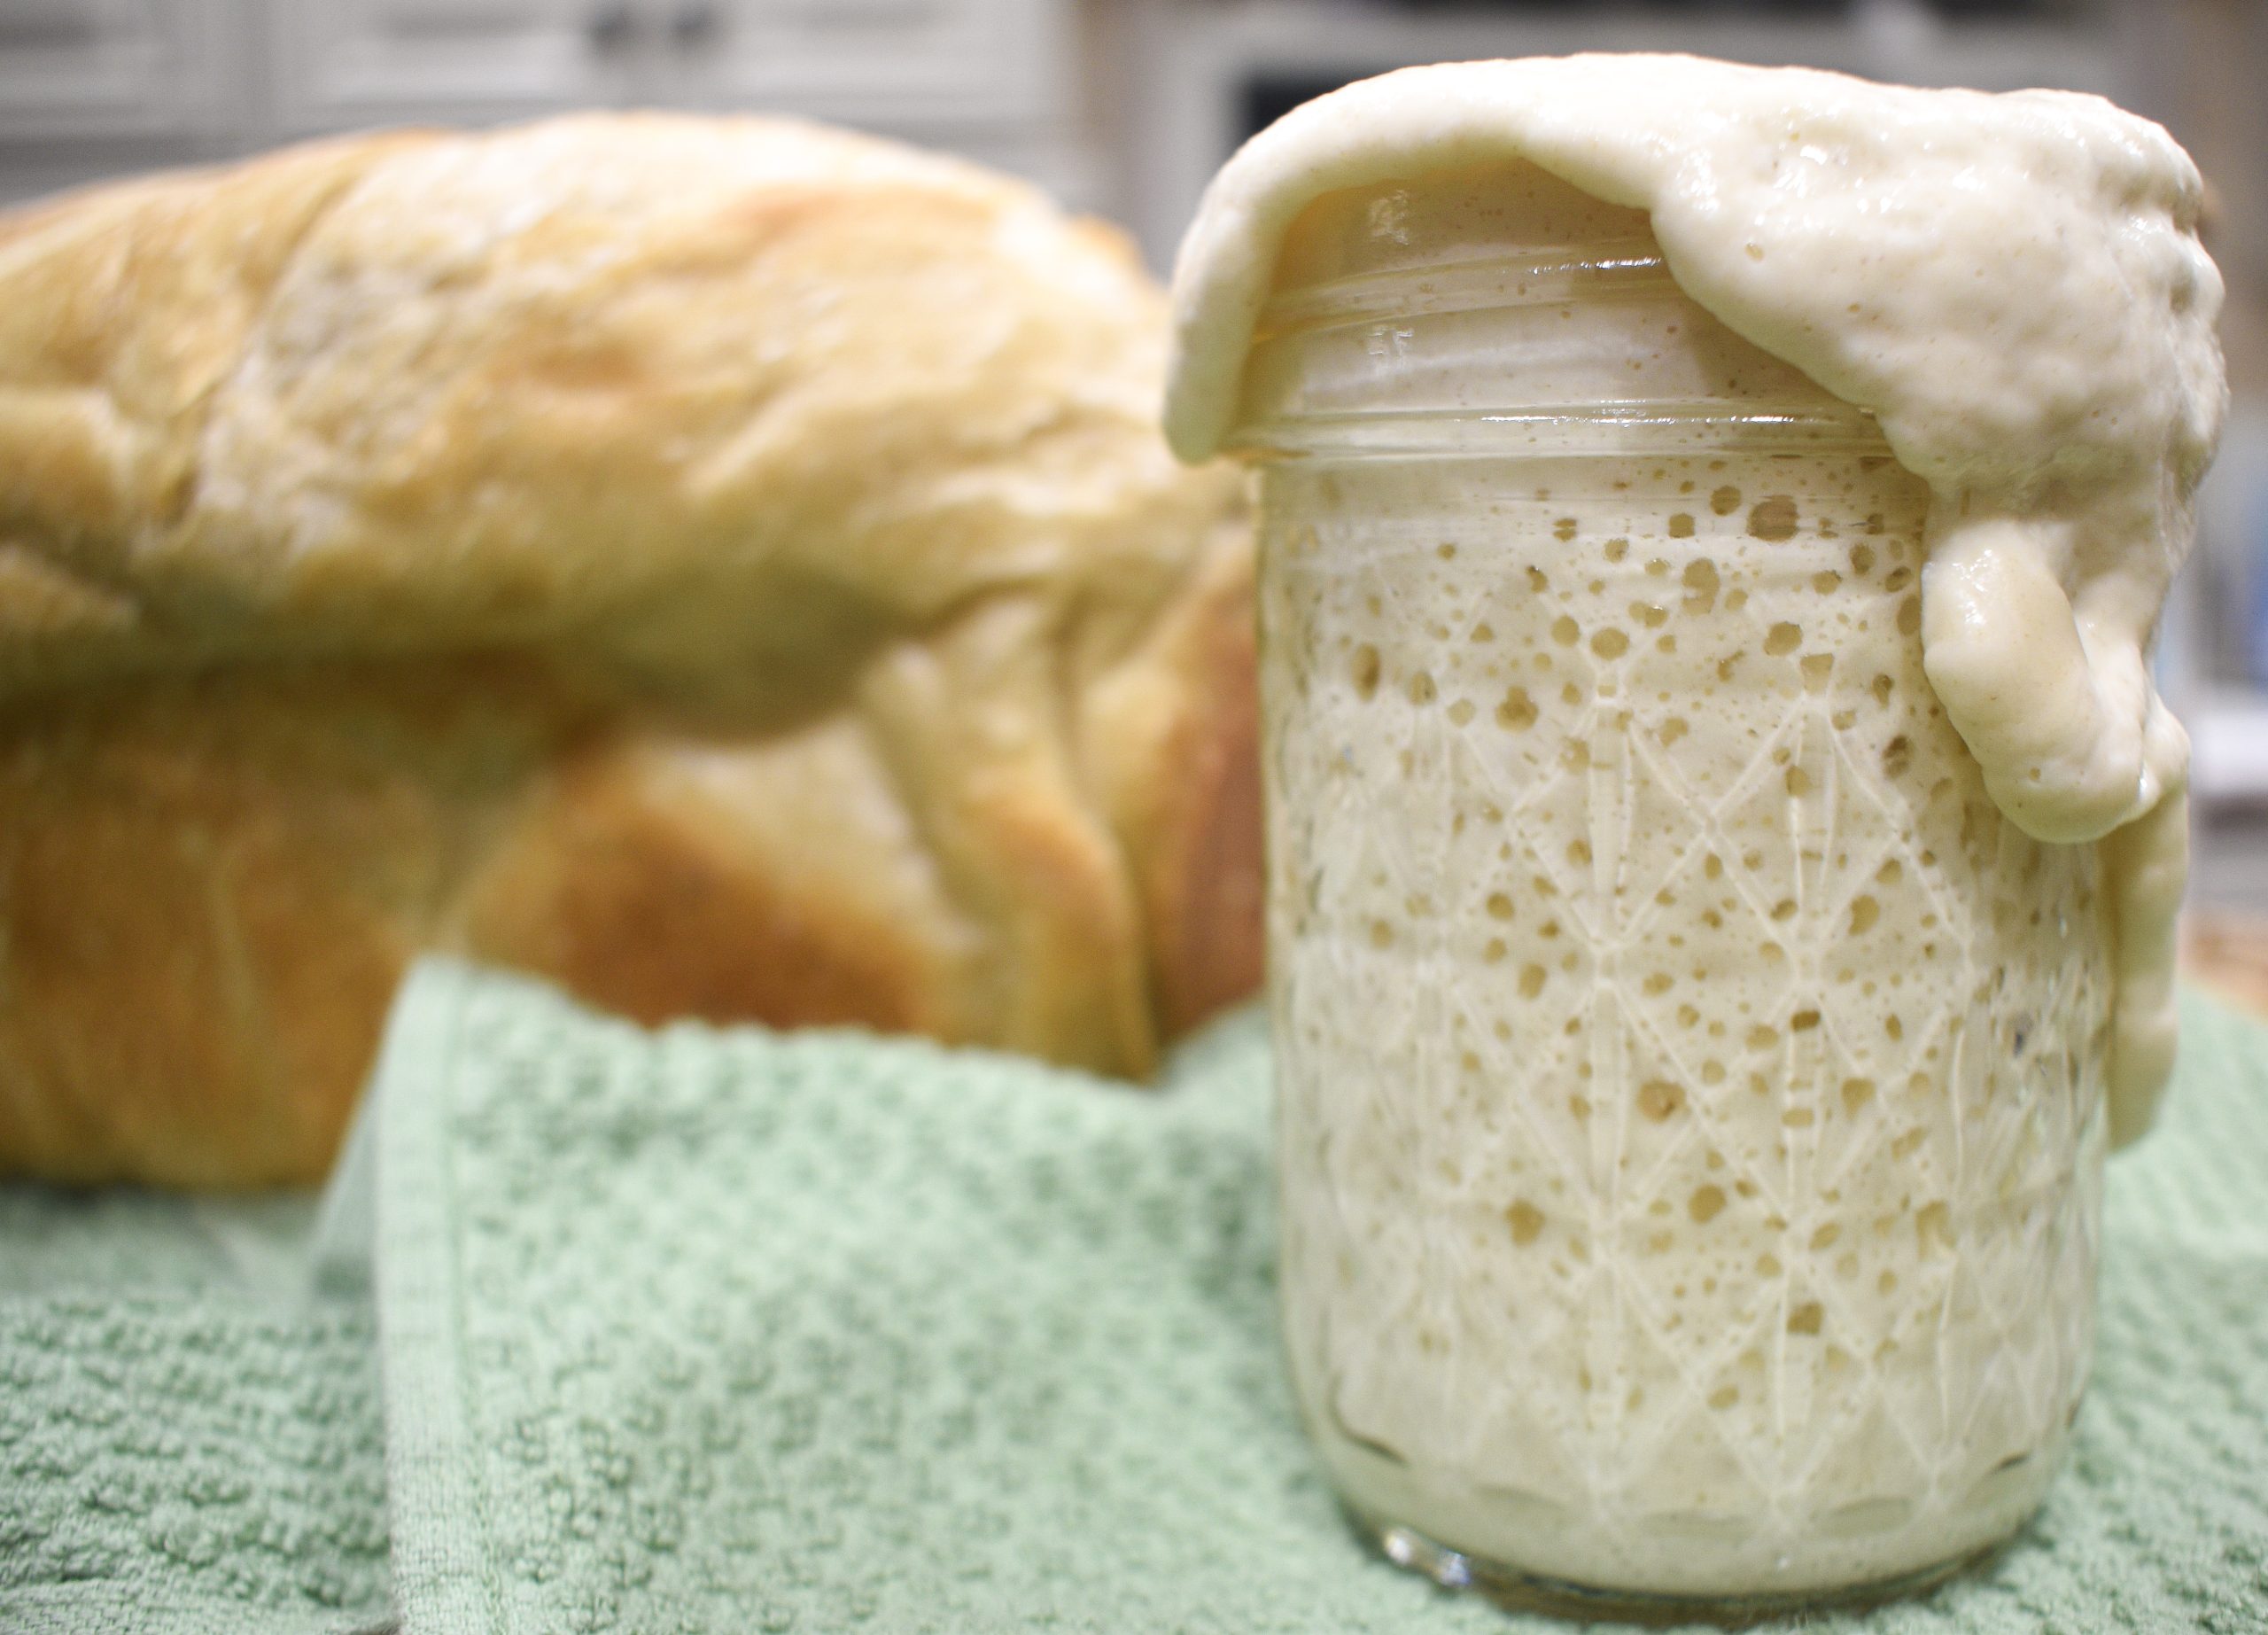
Your First Bake with Sourdough Starter
You worked so hard to get to this point – congratulations! Now what?
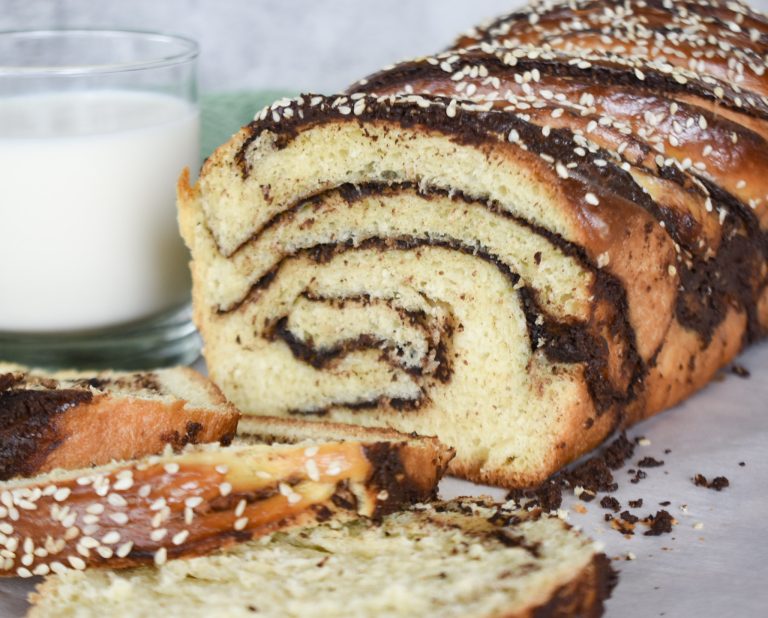
Time to test it out and make your first bread loaf! This is the most exciting part of this process. You have waited patiently (1 freaking month for me!) for your sourdough starter to become active, so get to work. You can start with a simple loaf or experiment with sourdough starter recipes like pancakes or brownies.
Tips for Your First Sourdough Bake:
Patience is Key: Sourdough takes longer to rise than dough made with commercial yeast. Don’t rush; let the natural processes do their work.
Observe the Dough, Not the Clock: Fermentation times can vary based on many factors, including room temperature and the strength of your starter. Focus on the dough’s volume, texture, and appearance to determine readiness.
Experiment and Learn: Your first loaf might not be perfect, and that’s okay! Mine wasn’t. Sourdough baking is as much about the journey as the destination. Each bake is an opportunity to learn and improve.
Baking your first sourdough loaf is an achievement that sets the foundation for many more sourdough adventures, from bread to pancakes, pizza crusts, and more. Enjoy the process and the delicious results!
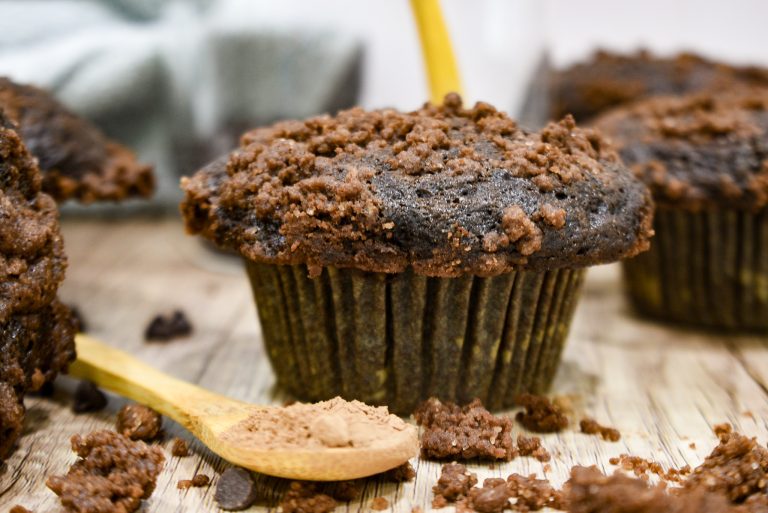
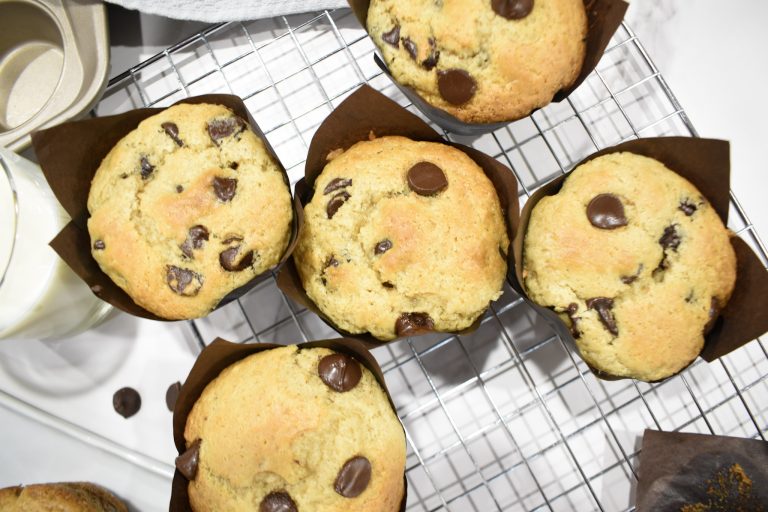
Ready to Bake With Your Sourdough Starter? Try these!
Sourdough Starter
Equipment
- 1 jar
- 1 Scale
- 1 spatula
- 1 measuring cup if not using scale
Ingredients
- 100 grams organic all purpose flour 3/4 cup, plus more for the remaining days
- 100 grams filtered water 1/2 cup, plus more for the remaining days
Instructions
Day 1
- Combine all-purpose flour and lukewarm filtered water in your jar or container.100 grams organic all purpose flour, 100 grams filtered water
- Stir vigorously with a spatula. You’re aiming for a thick but mixable consistency, somewhat like pancake batter.
- Cover the container with a cloth or a loose lid.
- Leave your container at room temperature (68°F to 75°F is ideal) away from direct sunlight to start the fermentation process.
Day 2
- Discard half of your starter (around 100 grams).
- Add 100 grams (about 3/4 cup) of flour and 100 grams (about 1/2 cup) of lukewarm water to the remaining starter.
- Mix well, cover, and let it sit at room temperature.
Day 3
- Continue the process of discarding half the starter and replenishing it with flour and water.
Day 4 and Beyond
- Keep feeding your starter daily, maintaining the same ratio.
Notes
- Observing your sourdough starter for any changes in smell and activity is essential. Do not be discouraged if you do not see any changes by day 7. Keep feeding daily about 24 hours apart.
- If your starter starts smelling like alcohol or there are signs of it rising and collapsing, increase feeding frequency to twice a day, 12 hours apart. This is a good sign!
Nutrition
The Grand Finale!
Through stories of trials and victories, we’ve learned that making your own sourdough starter is not just a culinary art but requires patience, resilience, and the wonders of natural processes. From figuring out the smells of fermentation to fine-tuning feeding routines and troubleshooting unexpected hiccups, each step has been a lesson in observation and adaptation.
As you start on your own sourdough journey, remember that it’s not just about the end result; it’s about enjoying every moment of the journey. Do not give up, be patient and enjoy the awesome smell of homemade sourdough bread. Happy baking, naturally!
Frequently Asked Questions:
Why is my sourdough starter not rising?
Your sourdough starter may not rise due to insufficient feeding, low temperature, or unwanted bacteria inhibiting fermentation.
Which flour should I use for starting my sourdough starter?
You can use any type of flour to start your sourdough starter, but whole wheat flour or rye flour are often recommended due to their higher nutrient and microorganism content.
Why should I use a sourdough starter?
You should use a sourdough starter for its unique flavor profile, improved digestibility, and nutritional benefits compared to bread made with commercial yeast.
When is my sourdough starter ready?
Your sourdough starter is ready when it consistently doubles in volume within 4 to 8 hours after feeding, has a pleasant sour aroma, and is full of bubbles. You can also use the float test by dropping a dollop of start in a bowl of water. If it floats, it is ready to use.
When is sourdough starter bad?
Your sourdough starter may be bad if it develops an unpleasant odor, such as a strong vinegar or putrid smell, or shows signs of mold growth.
Do you have to discard half of the sourdough starter every time you feed it?
When you are first starting out, it is recommended to discard it as it is not active enough to use. After it is active, you can save it and use it for many sourdough discard recipes.