Perfect Sourdough Bagels at Home with 6 ingredients
Did you know that the fermentation process in sourdough bagels can take up to 24 hours? But don’t let that intimidate you! I’ve spent some time perfecting these chewy, tangy delights, and I’m excited to share everything I’ve learned. The secret of sourdough bagels lies in the combination of wild yeast fermentation and the traditional bagel-making technique that dates back to 16th-century Jewish communities in Poland. Whether you’re a sourdough enthusiast or a bagel lover, this guide will help you create authentic, artisanal bagels that rival your favorite bakery!
Essential Ingredients and Equipment
Disclaimer: As an Amazon Associate, I earn from qualifying purchases.
Let me tell you something I learned the hard way: not all flour is created equal when it comes to bagel making! I still remember my first batch of bagels where I used all-purpose flour – they were more like sad, floppy bread rings than proper bagels. Trust me, you want to invest in high-protein bread flour, preferably one with at least 13-14% protein content. This higher protein content is crucial for developing that chewy texture we all love in a good bagel.
One ingredient that totally changed my bagel game was diastatic malt powder. I’ll be honest – I had no idea what this stuff was when I first started! But it’s basically malted barley that’s been dried and ground into a powder, and it gives the yeast extra food to work with during fermentation. Just a small amount (about 1% of your flour weight) helps create that beautiful brown crust and subtle sweetness that makes bagels irresistible.
As for equipment, you don’t need anything super fancy, but there are some essentials that will make your life so much easier. A good kitchen scale is non-negotiable – I learned this after trying to make bagels using cup measurements and getting inconsistent results every single time. You’ll also want:
- A large mixing bowl (I prefer glass or stainless steel)
- A bench scraper (seriously, this $5 tool is worth its weight in gold)
- Parchment paper
- A large pot for boiling
- Baking sheets
- A spider strainer or slotted spoon
Optional but helpful items include a stand mixer (though I actually prefer hand-kneading my bagel dough), a baking stone, and silicone mats.
The Perfect Sourdough Bagel Dough
Getting your dough right is where the magic happens, and boy, did it take me some trial and error to figure this out! The key to perfect bagel dough is understanding hydration. You’re looking for a relatively stiff dough – around 58-62% hydration. This is much lower than your typical sourdough bread, and it’s what gives bagels their distinctive chewy texture.
The mixing process starts with combining your mature sourdough starter (I feed mine twice before bagel-making day), bread flour, water, and that tiny bit of diastatic malt powder we talked about. Here’s a pro tip I picked up after countless batches: hold back about 10% of your water at first. This allows you to adjust the hydration based on your flour and environment. Some days you’ll need all of it, others you won’t.
Temperature is crucial here – aim for a final dough temperature around 78°F (26°C). I used to ignore this detail completely, but it makes a huge difference in fermentation. On cold days, I warm my water slightly to compensate. Once everything’s mixed, you’ll start kneading. This is where patience becomes your best friend!
The windowpane test is your secret weapon for knowing when the dough is ready. Take a small piece of dough and gently stretch it – if you can stretch it thin enough to see light through it without it breaking, you’ve developed enough gluten. The first time I achieved a perfect windowpane, I literally did a happy dance in my kitchen! If you can’t get there, keep kneading. The dough should feel smooth and slightly tacky but not sticky.
Fermentation and Shaping Techniques
When it comes to bulk fermentation, I was totally guilty of rushing this step in my early bagel-making days. What a mistake! The bulk ferment is where your sourdough starter really works its magic. You’re looking for the dough to increase by about 30%-50% – not double like regular bread. This usually takes 3-4 hours at room temperature, but here’s a neat trick I discovered: gently press your finger into the dough. If it springs back slowly but doesn’t completely fill in, you’re right where you want to be.
Dividing and pre-shaping is where precision matters. I weigh each piece to exactly 135g (trust me, consistency makes a huge difference!). Once divided, I do a quick pre-shape into balls. Here’s something I wish someone had told me earlier: let these rest for 15-20 minutes before final shaping. This relaxes the gluten and makes the final shaping so much easier.
Now, about shaping methods – this is where things get interesting! The traditional rope method involves rolling each ball into a rope about 8-10 inches long, then wrapping it around your hand and rolling the seam on your work surface. The poke method, which I secretly prefer, involves pushing your thumb through the center of the ball and gradually stretching the hole. Both work great, but the poke method tends to give more consistent results for beginners.
The Cold Retard: A Crucial Step
Let me tell you about my “overnight revelation.” I used to think cold retarding was optional until I made two batches side by side – one with overnight refrigeration and one without. The difference was mind-blowing! That long, cold fermentation develops complex flavors that you just can’t get any other way.
After shaping, I arrange my bagels on parchment-lined baking sheets, making sure to leave enough space between each one. A light coating of oil on the parchment prevents sticking – learned that one the hard way! Cover them loosely with plastic wrap and pop them in the fridge for 8-12 hours. I’ve found 8 hours to be the sweet spot in my kitchen.
During the cold retard, the bagels should puff up slightly but not dramatically. If they over-proof, you’ll lose that characteristic chewy texture. I check them by doing the float test right out of the fridge – a properly retarded bagel should float in cold water.
Boiling and Baking Methods
The boiling step is where bagels really become bagels! I was so nervous about this step at first, but it’s actually pretty straightforward. Fill a large pot with water and add either barley malt syrup or honey (about 1 tablespoon per gallon of water) and baking soda. The honey and baking soda is my favorite method. Some traditional recipes call for lye, but I stick to honey and baking soda for both safety and flavor.
Boiling time affects the final texture: 30 seconds per side gives you a thinner crust, while 1-2 minutes creates a chewier exterior. I go for 1 minute per side because that’s what seems to work the best for me and achieve the texture I like.
For baking, you want your oven screaming hot – 450°F (232°C) with a baking stone if you have one. I create steam by tossing a few ice cubes onto a preheated pan on the bottom rack. The bagels bake for about 20-25 minutes, rotating halfway through for even browning.
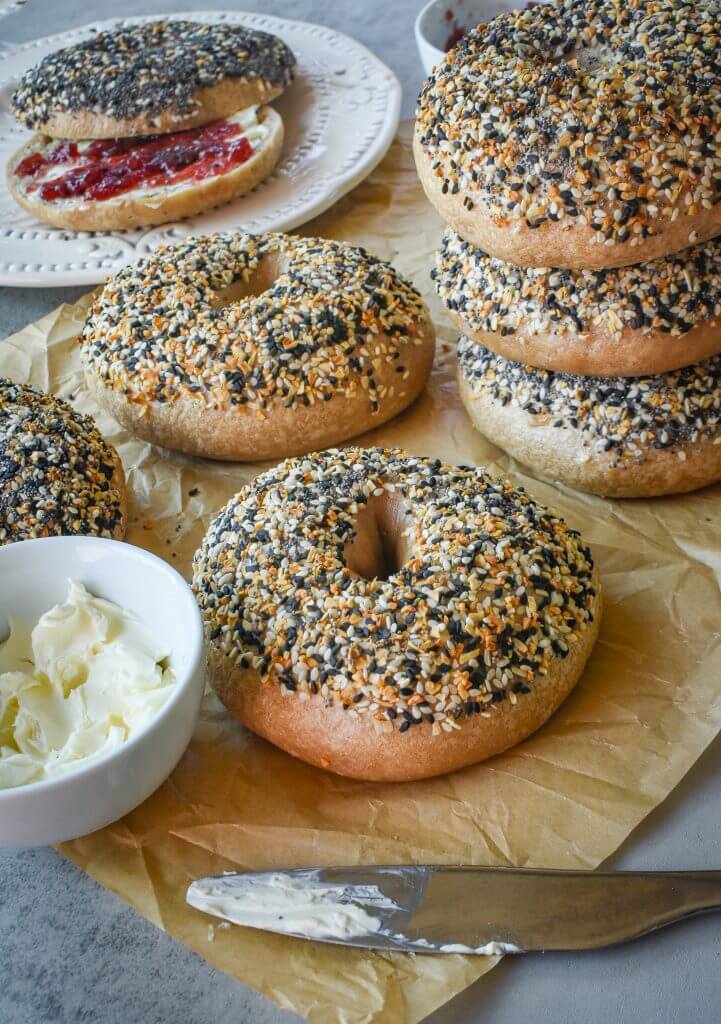
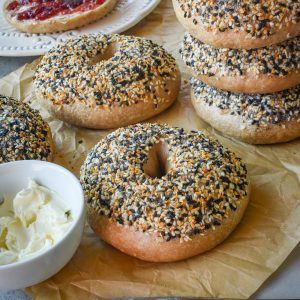
Toppings and Variations
Here’s where you can really let your creativity shine! The key to getting toppings to stick is to apply them immediately after boiling, while the surface is still tacky. Don’t make the rookie mistake to add the toppings before boiling them!
For everything bagel seasoning (my absolute favorite), I mix:
- 2 tablespoons poppy seeds
- 2 tablespoons sesame seeds
- 2 tablespoons dried minced onion
- 2 tablespoons dried minced garlic
- 1 tablespoon coarse salt
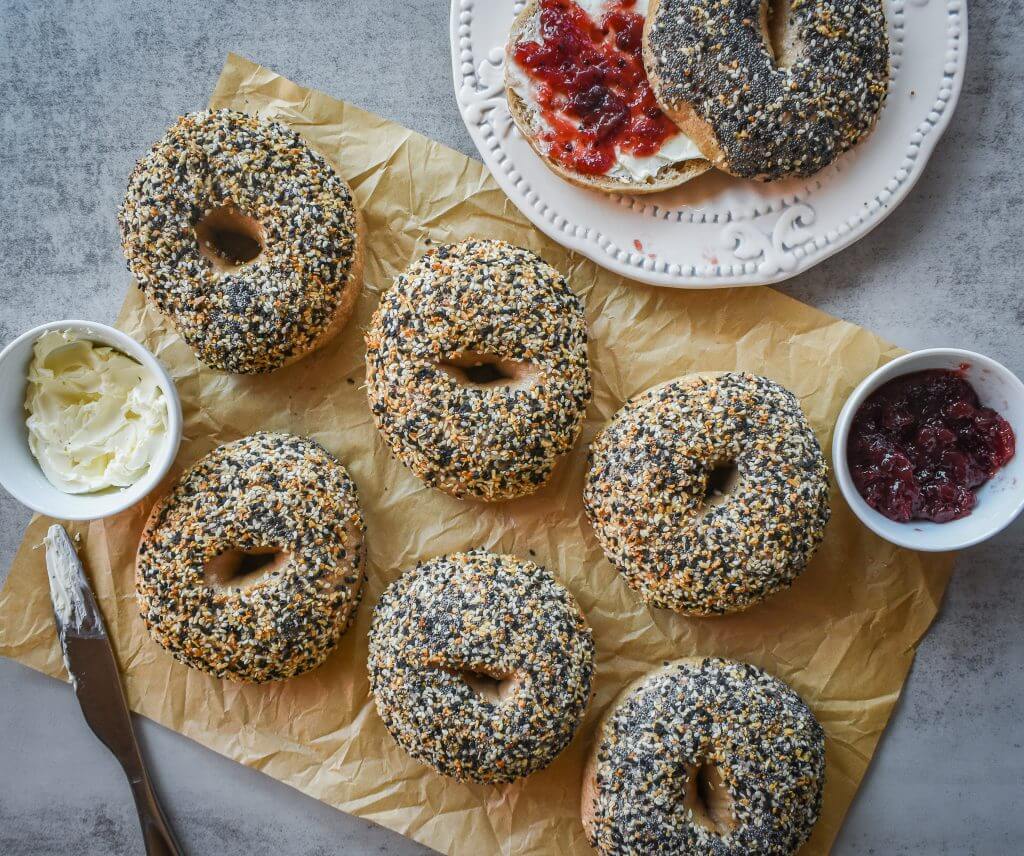
Don’t be shy with the toppings – they should really cover the surface. Some of my favorite combinations include:
- Jalapeño cheddar (either mixed in the dough or as a topping)
- Cinnamon raisin with a honey-wheat dough base
- Sesame seed and cracked black pepper
- Caramelized onion (worked into the dough) with poppy seeds
- Cinnamon sugar
Sourdough Bagels
Equipment
- 1 Scale
- 1 Stand mixer with dough hook attachment
- 1 bulk fermentation container / bowl
- Plastic wrap
- 1 baking sheet or stone
- 1 Parchment paper
- 1 large pot for boiling
- 1 slotted spoon
Ingredients
- 185 g water
- 21 g granulated sugar
- 150 g active sourdough starter
- 430 g high protein bread flour (~13-14%)
- 9 g salt
- 3 g diastatic malt powder
For boiling:
- 3 qt water
- 30 g honey
- 4 g baking soda
Instructions
- In a bowl of a stand mixer fitted with the dough hook attachment, combine the water, sugar, active sourdough starter, high protein bread flour, all-purpose flour, salt, and diastatic malt powder.
- Mix on low speed (1 in a KitchenAid) for about 2-3 minutes until all dry ingredients have been incorporated.
- Increase the mixer speed to 2 and mix for about 5 minutes until the dough is smooth. This is a stiff dough. Be careful not to overwork your mixer! If you feel any resistance, remove the dough from the mixer and continue kneading by hand until the dough is smoth and elastic.
- Transfer the dough to a bulk fermentation container and let is rest in a warm place for 3-4 hours. The dough is ready once it has risen about 30-50%.
- Divide the dough into 6 equal pieces (about 135g each).
- Shape the dough pieces into balls by pinching the seams together and rolling it on your work surface so it drags and tightens the outside skin of the dough. Set aside and repeat with the other 5 pieces.
- Let the dough balls rest for 15-20 minutes to relax the gluten.
- Grab one of the dough balls and poke a hole in the middle with your thumb. Insert both thumbs in the hole and slowly rotate while stretching the dough. You want to stretch it until the hole is about 4 inches in diameter. It will seem like that hole is too big but it will shrink as it proofs the second time.
- Transfer shaped bagel to a pan lined with parchment paper. Repeat with the remaining bagels.
Second Rise
- Transfer the tray to a warm place in your kitchen and let the bagels proof for about 2 hours until almost doubled. They should be nice and puffy.
- Pop them in the fridge for 8-12 hours.
Boiling
- Place a pan heavy pan or tray at the bottom of the oven. Preheat oven to 450°F (232°C).
- Fill a large pot with water and add either barley malt syrup or honey and baking soda.
- Once the water is boiling, drop 2 or 3 bagels (depending on the size of your pot) into the boiling water. You don't want to overcrowd the pot as bagels will expand while boiling.
- Boil about 1 minute per side.
- Remove bagels with a slotted spoon and place them on the baking sheet. Add desired toping. Repeat with the remaining bagels.
Baking
- Transfer the baking sheet into the preheated oven.
- Add a few ice cubes to the pan that was previusly placed in the oven. Close the oven and set the timer to 20-25 minutes.
- Cool and slice.
Nutrition
Storage and Freezing Guidelines
For storage, let your bagels cool completely – I mean completely! – before storing. They’ll keep at room temperature for 2 days, but I prefer to slice and freeze them. Pop them straight from the freezer into the toaster, and they’re almost as good as fresh. Almost.
Remember, making great sourdough bagels is a journey. Each batch teaches you something new, and that’s part of what makes it so rewarding. Even now, after hundreds of batches, I’m still tweaking and learning. That’s the beauty of sourdough baking!
Conclusion:
Creating sourdough bagels at home is a rewarding journey that combines artisan bread-making skills with traditional bagel techniques. With patience and practice, you’ll master the perfect chewy texture and complex flavors that only sourdough can provide. Remember, great bagels take time, but the results are absolutely worth it! Ready to start your sourdough bagel adventure? Gather your ingredients, feed your starter, and let’s create something amazing together.